Have you ever stood in your cramped bathroom holding a paint swatch and thought, “There has to be a better way to fit a shower here?” You’re not alone. Transforming a tiny bathroom into a functional, beautiful space that includes a walk-in shower is one of the most satisfying home improvement wins. Whether you’re planning a weekend DIY project or a full remodel, these ideas for a small bathroom walk in shower will help you maximize space, light, and style without breaking the bank.
Why choose a walk-in shower for a small bathroom?
Walk-in showers (also called curbless showers or open shower enclosures) offer a contemporary, open feel that visually expands a small bathroom. They remove the visual bulk of a tub or framed enclosure, let natural or artificial light flow, and are easier to access—great for aging-in-place upgrades. Key benefits include better accessibility, easier cleaning, and the option for a seamless floor transition that makes the whole room feel larger.
Design basics: planning your compact walk-in shower
Measure and map
Start with accurate dimensions. Measure ceiling height, available floor area, door swings, and plumbing locations. Sketch a simple floor plan to determine if a linear drain or corner installation is best. Remember that a comfortable shower area is typically at least 32″ x 36″, but clever layouts can make smaller footprints work.
Choose a layout that opens the room
- Corner walk-in shower with a single glass panel to keep sightlines clear.
- Linear or wet-room style against one wall for easier waterproofing.
- Curbless entry to create a continuous floor plane—great for shower mobility.
10 practical ideas for a small bathroom walk in shower
Below are actionable design ideas, mixing DIY-friendly upgrades with options that may require a pro.
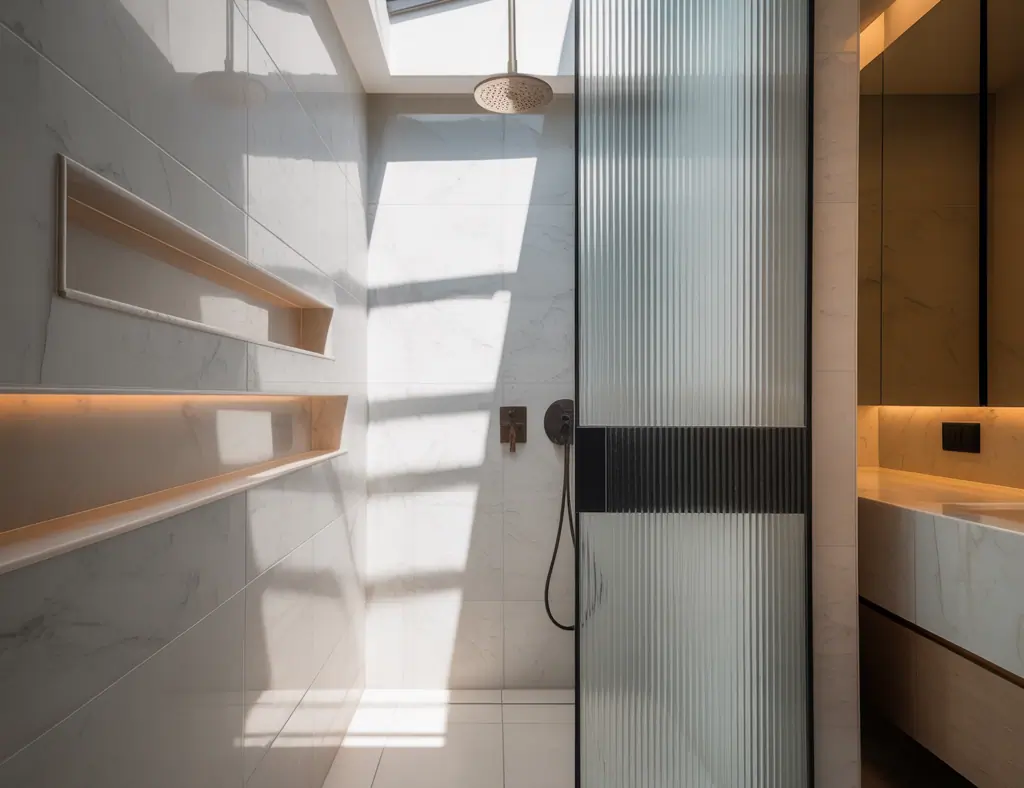
1. Frameless glass panel for uninterrupted sightlines
Install a single fixed glass panel. It’s minimal, reflects light, and keeps the room visually open. Silicone seals and discreet brackets make installation straightforward for experienced DIYers.
2. Use large-format tiles or continuous flooring
Large tiles or the same floor tile throughout reduce grout lines, making the space feel larger. For a wet-room approach, use waterproof membrane systems before tiling.
3. Go curbless with a slight slope and linear drain
A curbless threshold removes barriers and creates a seamless look. A linear drain along the wall is easier to slope correctly than a center drain and is widely available in low-profile options.
4. Niche storage and recessed shelves
Built-in niches save space and avoid bulky caddies. Place a shelf at hip height for bottles and another higher for soaps. Waterproofing with a flexible membrane is crucial here.
5. Brighten with light-colored grout and reflective finishes
Pair light wall tiles with a slightly darker grout for easy maintenance. Glossy finishes reflect light; matte finishes hide water spots. Select based on your lifestyle.
6. Install a fold-down bench
A small fold-down teak or waterproof bench provides seating without stealing space. Great for shaving or showering with stability, and it folds away when not needed.
7. Compact shower heads and thermostatic valves
Choose a slim overhead rainhead or a multi-function handheld for the ultimate in flexibility. A thermostatic valve keeps temperature steady—especially helpful in smaller plumbing systems.
8. Lighting and ventilation
Install a moisture-rated recessed light over the shower and an efficient exhaust fan sized for the room. A clear glass panel helps share light from existing fixtures or natural sources.
9. Bold accent wall for depth
Create an illusion of depth with a vertical tile accent wall or patterned mosaic behind the shower. This draws the eye and adds personality without crowding the layout.
10. Mixing materials strategically
Combine warm wood-look tile with cool porcelain and matte black fixtures to add contrast while keeping the space visually simple. Minimal hardware reduces clutter.
DIY step-by-step: converting a small alcove to a walk-in shower
- Plan and measure: confirm dimensions, plumbing, and whether your floor can be modified for a curbless entry.
- Remove existing fixtures and prep the space: turn off water, demo, and clean the subfloor.
- Install waterproofing membrane and slope the shower pan toward your chosen drain.
- Install the drain (linear or center) and test for water tightness.
- Tile walls and floor: use large-format tiles or mosaic anti-slip tiles for the floor.
- Install glass panel and fixtures: anchor glass to studs or floor with proper hardware.
- Seal edges with mildew-resistant silicone and test the shower for leaks and drainage.
Always check local building codes and consider hiring a pro for plumbing or structural work. Waterproofing mistakes are costly to fix.
Budgeting and materials: what to expect
Cost varies widely. A basic DIY-friendly update (glass panel, tile, fixtures) can be modest, while a full curbless remodel with plumbing relocation is more expensive. Prioritize waterproofing, a good drain, and quality fixtures; these give the best long-term value. For inspiration beyond bathrooms, check our pages on DIY projects and home design ideas for complementary upgrades.
Small bathroom walk in shower: styling and finishing touches
Keep accessories minimal—narrow grab bars, matching metal finishes, and a slim shower caddy. Add a moisture-resistant plant for freshness. Towels in contrasting colors can add depth without overwhelming the compact space.
Frequently Asked Questions
1. Can I install a walk-in shower in a very small bathroom?
Yes. Many compact walk-in shower designs use corner layouts, a single glass panel, and curbless entries to maximize space. Careful measurement and planning are essential; you may need to reposition plumbing or use a compact drain solution.
2. Is a curbless shower a good DIY project?
A curbless shower can be a DIY project for experienced renovators due to precise sloping and waterproofing requirements. If you’re comfortable with subfloor work and membranes, it’s doable. Otherwise hire a professional for the drain and waterproofing to avoid leaks.
3. What type of tile is best for small walk-in showers?
Large-format porcelain tiles on the walls reduce grout lines and visually expand the space. For floors, use smaller or textured tiles to ensure slip resistance—mosaics or anti-slip porcelain tiles work well.
Conclusion: start your small bathroom walk in shower makeover today
Transforming a tiny bathroom into a stylish, functional space with a walk-in shower is entirely achievable with smart planning, the right materials, and a few DIY skills. From frameless glass panels to curbless entries and niche storage, the ideas small bathroom walk in shower options above give you a roadmap to maximize space and style. Ready to take the next step? Gather measurements, pick one design idea to try, and explore more inspiration on kitchen upgrades and related home projects. If you want help planning your layout or picking materials, leave a comment or start your design checklist—let’s get your bathroom working and looking its best.
For more ideas on how to make the most of your small bathroom with a walk-in shower, check out these Ideas for Walk in Closet
For more ideas on how to make the most of your small bathroom space, check out these Ideas for Walk in Closet