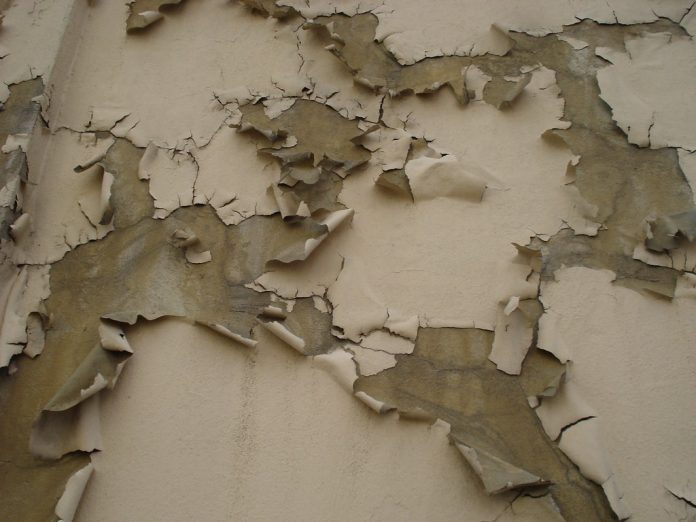
Chipped wall paint refers to paint flakes or chips falling off the wall surface. This usually occurs due to underlying issues such as water leaks, plumbing vibrations, swelling doors and windows, or the operation of appliances like air conditioning units that cause movement or moisture exposure. Addressing both the root cause and the damaged paint is essential for a long-lasting repair.
Causes of Chipped Paint on Wall
Several factors can contribute to chipped paint on walls. Common causes include water damage from leaks, vibrations or movement from plumbing pipes or appliances, swelling or warping of doors and windows due to humidity, and inadequate surface preparation before painting. Identifying and addressing the source of the problem is crucial before repairing the paint to prevent recurring damage.
Best Methods for How to Fix Chipped Paint on Walls
Unlike the sturdy wall surface composed of plaster, brick, or stone, paint layers are thin coatings made from primers and topcoats. To fix chipped paint effectively, it’s important to match the paint layer’s texture and ensure proper adhesion. This method works best for small chips, peeling spots, or minor damages.
1. Prepare Tools Required for Fixing Chipped Paint on the Wall
- Ladder: Use a sturdy ladder with rubber tips to safely reach high or difficult corners. Always take safety precautions to avoid slips and falls.
- Small Pry Bar: A flat metal tool, preferably with a folded or blunted sharp end to prevent injury or surface damage, is useful for removing loose paint.
- Hammer: A small hammer is essential for removing nails or prepping the surface before repair.
- Putty Knife: A 3-inch wide putty knife works well for applying spackle or primer. Ordinary butter knives can be used, but they may wear out quickly with frequent use.
- Drop Cloth: Protect floors and furniture by laying down a drop cloth to catch paint debris and spills.
- Primer: High-quality primer ensures that the new paint adheres properly to the repaired surface.
- Paint: Select a paint that matches the existing wall color and finish. Bringing a sample of the old paint to the store can assist in finding the right match.
2. Clean the Area Around the Repair Spot
Thoroughly clean the damaged area with a damp cloth to remove dirt, dust, and debris. Ensure you clean all cracks and crevices to allow the new paint to adhere effectively.
3. Remove Loose Paint
Gently use the pry bar to remove any loose or peeling paint flakes. Take care not to remove sound paint or damage the underlying surface. For severely damaged areas, consider alternative repair methods or complete refinishing.
4. Fill Cracks, Crevices, and Holes with Spackle Paste
Using the putty knife, apply spackle paste to fill in any cracks, crevices, or holes. Allow it to dry completely — using a hairdryer on low heat can speed up this process for large areas. Sand down any uneven spots once dried.
5. Apply Primer to Chips Larger Than ½ Inch
For chips larger than half an inch, fill the area with primer to promote adhesion before painting. Use the putty knife to ensure primer reaches all areas inside the chip. Let it dry thoroughly before proceeding.
6. Paint the Repaired Area
After the primer dries, apply paint matching your existing wall finish using a brush or roller for smooth and even coverage. Multiple coats may be necessary for a seamless look. Allow sufficient drying time between coats.
7. Clean Up
Clean all tools and materials, safely fold and store your ladder, and dispose of paint debris according to local regulations. Proper cleanup ensures your workspace is tidy and prevents any damage or accidents.
With patience and the right tools, fixing chipped paint on walls can be a straightforward DIY project. Accurately identifying the cause and methodically following repair steps ensures your walls look fresh and well-maintained.
Conclusion
Repairing chipped paint can restore the beauty and integrity of your walls without the cost of a full repaint. By addressing underlying issues and using correct preparation and painting techniques, you can extend the life of your walls and prevent future damage. Always ensure to use quality materials and take your time for the best results.
FAQs
Read more: What Are Cracks In Ceilings? Its Types, Causes, And How To Fix Cracks In Ceiling With Detail
If the surface is severely damaged, repairing chipped paint may not suffice. Instead, consider alternative methods such as wall patching or complete refinishing. Many specialized products are available for repairing damaged walls. Consult your local hardware store or a professional for the best approach.
It’s important to use paint compatible with your existing wall finish. To ensure a perfect color and texture match, bring a sample chip of the old paint to the store when purchasing new paint.
For chips larger than ½ inch, fill them with primer first to ensure proper adhesion before painting. Apply primer thoroughly inside all cracks and crevices and allow it to dry completely prior to painting.
Paint peeling near ceilings often indicates excessive moisture. Improve ventilation by opening windows and using fans to reduce humidity. If mold is suspected, it’s best to hire a professional to safely remove it and prevent health risks or further wall damage.
For further insights on wall maintenance and paint repair, explore The Best Exterior Painting Services and visit our Decoration category for comprehensive guides and expert tips.
Additionally, proper wall preparation before painting is critical to prevent future paint chipping. This includes cleaning, sanding, and priming surfaces thoroughly. Using high-quality paint and maintaining appropriate indoor humidity levels also help extend the lifespan of your paint job. Regular inspection and timely repairs can save you from costly renovations in the future, ensuring your walls stay vibrant and intact for years to come.


